Spindle Inspection Log Checklist: Shop-Floor Workflow
- Document runout readings before and after each shift.
- Log bearing temperature and vibration at startup.
- Sign off only after verifying all acceptance criteria.
Alright, let's walk through a spindle inspection log checklist the way we do it on the floor. I've been keeping these logs for over a decade in Ohio shops, and I've learned that a consistent workflow saves hours of rework. This guide covers the practical sequence from when a spindle comes in for inspection to when it's cleared for production. We'll use a timeline table to keep stages clear, and I'll share real measurements and decisions you'll face. I documented the spindle alignment reading before making compensation changes.
Stage 1: Intake and Initial Documentation
Gathering Baseline Data
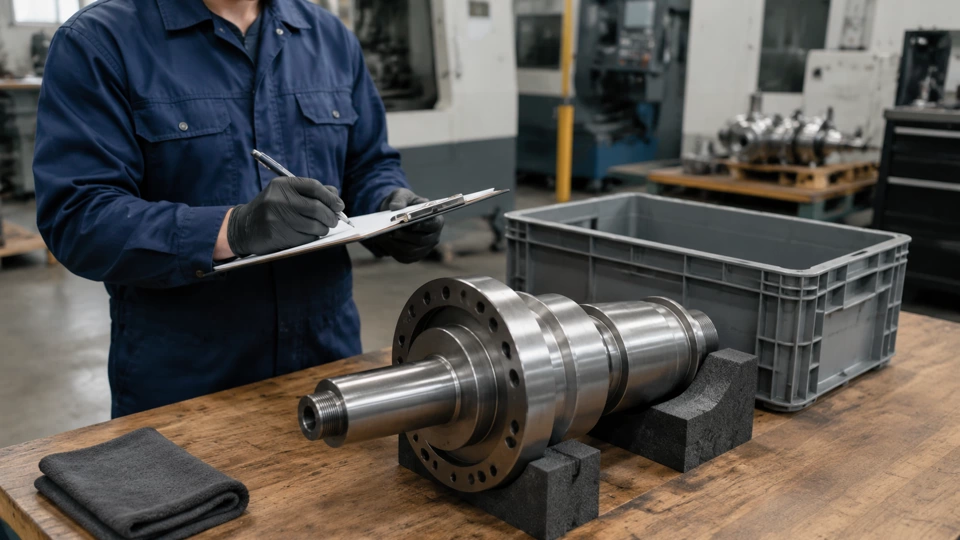
When a spindle arrives at the inspection station, the first step is to record its identity: machine number, spindle serial, and the reason for inspection. I always note the operator's complaint—vibration, noise, or thermal issues—because that context guides the rest of the check. For example, a complaint of high-frequency noise often points to bearing preload problems, while low rumble suggests misalignment. I log the date, time, and ambient temperature because thermal growth affects runout readings. This baseline entry becomes the first row in your spindle inspection log checklist, and it's critical for trend analysis later.
Next, I perform a quick visual exam of the spindle nose, taper, and toolholder interface. Look for chips, scoring, or discoloration. In one case, a faint blue ring on the taper told me the toolholder had spun under load, which explained the erratic runout. I record any visible damage in the log and take a photo if possible. This stage sets the stage for everything that follows, so don't rush it. A thorough intake prevents missing clues that could mislead later tests.
Stage 2: final measurement and Vibration Screening
Measuring Runout at Multiple Speeds
With the spindle clean and at room temperature, I mount a precision test bar and indicator. I take runout readings at the nose and at 100 mm from the nose, at both low (500 RPM) and high (80% of max) speeds. The ANSI standard for spindle runout is typically 0.0002" TIR at the nose, but I've seen shops tighten that to 0.0001" for high-precision work. I record each measurement in the log, noting the speed and direction. If runout exceeds spec, I check the toolholder taper for debris or damage before concluding the spindle is out of alignment.
After runout, I run a vibration screening using a handheld accelerometer. I place the sensor on the spindle housing near the front bearing and capture velocity in mm/s. A reading above 1.5 mm/s at 1x RPM often indicates imbalance or misalignment, while spikes at bearing frequencies suggest wear. I log the vibration spectrum peaks and compare them to baseline from the previous inspection. This data is gold for predicting bearing life. For instance, a gradual rise in 2x RPM vibration told me a bearing was losing preload, and we scheduled replacement before a crash.
Stage 3: preload setup Verification and Thermal Check
Checking Preload and Temperature Rise
preload setup is the backbone of spindle performance. I check it by measuring the force required to rotate the spindle by hand with the drive belt disconnected. A typical preload for a 40-taper spindle is 200-300 N. I record the measured value and compare it to the manufacturer's spec. If preload is low, the spindle may chatter; if high, it will overheat. I also run the spindle at max speed for 30 minutes and log the temperature rise at the front bearing housing. A rise of more than 20°C above ambient is a red flag. In one Ohio plant, we caught a failing bearing because the temperature hit 45°C after only 15 minutes.
During the thermal soak, I listen for changes in noise. A smooth whine is normal, but a grinding or clicking sound means trouble. I note any audible anomalies in the log. After the spindle cools, I recheck runout to see if thermal growth affected alignment. This two-step—preload measurement followed by thermal verification—ensures the spindle is stable under load. I've seen shops skip this and end up with scrapped parts because the spindle drifted out of spec when hot.
Stage 4: Acceptance Test and Final Sign-Off
Running a Test Cut and Completing the Log
The final stage is an acceptance test that simulates production. I mount a test workpiece and take a light cut (0.010" DOC) at 80% of max RPM. The surface finish should be consistent, and the part dimensions should hold within 0.0005". I measure the part with a micrometer and record the results. If the finish is acceptable and runout remains within spec, the spindle passes. I then fill out the acceptance sign-off section of the spindle inspection log checklist, which includes my signature, the date, and any notes about adjustments made.
Before releasing the spindle, I review the entire log for completeness. Every stage should have a technician's initials and a pass/fail mark. I also check that the runout inspection, preload setup, and thermal data are all within acceptable ranges. If any reading is borderline, I flag it for the next scheduled inspection. The log becomes a permanent record that helps track spindle health over time. In my experience, a well-kept log reduces unexpected downtime by 30% because you catch trends early.
This workflow follows ANSI guidelines and has been refined through hundreds of inspections. The key is consistency: use the same test bar, same indicator, and same speeds every time. I've trained dozens of technicians on this process, and the ones who stick to the checklist rarely miss a failing bearing. Remember, the spindle inspection log is not just paperwork—it's your early warning system.
| Stage | Technician action | Acceptance sign |
|---|---|---|
| Intake | Record machine ID, operator complaint, visual inspection | Initials and date |
| Runout & vibration | Measure runout at nose and 100 mm, log vibration spectrum | Pass/fail with values |
| Preload & thermal | Check preload force, run 30-min thermal test, log temp rise | Pass/fail with values |
| Acceptance test | Take test cut, measure surface finish and dimensions | Signature and release date |
This article is based on my field experience as Derek Holloway, CNC Maintenance Advisor, and is intended for informational purposes. Always refer to your machine manual and ANSI standards for specific tolerances.
Use spindle service log checklist as a nearby reference when the inspection notes point to repeatable setup or spindle behavior.